Xiaoqiang Bottom Driver Firmware Download and Upgrade Methods
Users received Xiaoqiang after March 11, 2017. Please refer to this post to upgrade the firmware. If you cannot upgrade, please ask for customer service before using the following method. Manually upgrade risk, please consult customer service before operation.
Xiaoqiang v4_3.hex ,Right click "Save As..." and download it as xiaoqiang.hex
The firmware is an ordinary hex file and supports any stm32 downloader. After stm32 is burned, please complete the host computer update operation according to the upgrade chassis ros driver package xqserial_server. Finally recalibrate the chassis IMU according to this tutorial.
The following describes the use of Xiaoqiang's own method of using USB to serial port to write stm32. After this upgrade, you can use the simple upgrade method in this post.
- Find a Windows computer, download and install this stm32flash software
flash_loader_demo_v2.8.0.exe , right click "Save as..." to start download
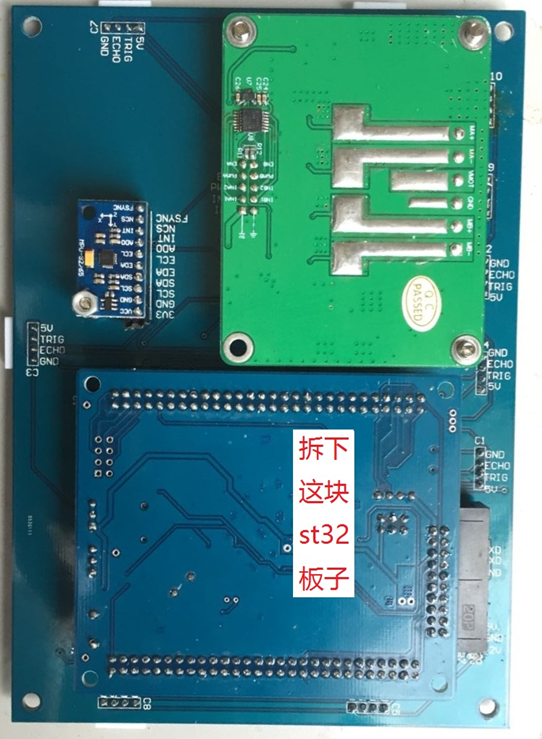
- After power off the chassis, remove the VMOT GND wire on the middle of the green motor driver board, slowly pull out the stm32 core board on the chassis, and then adjust the two short caps on the board according to the following figure.
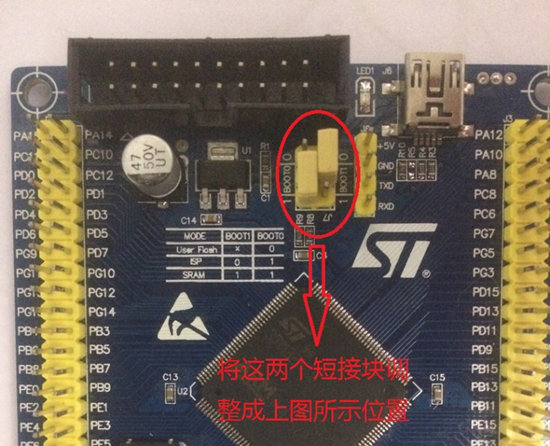
Insert the stm32 board after adjustment in the second step into the chassis. Note that the pins need to be fully aligned with the chassis, and then the chassis is powered on.
Unplug the usb head of the USB to serial port module on Xiaoqiang from the host computer and insert it into the windows computer. Open the Flash Loader Demo program from the Start Programs menu. All Programs->STMicroelectronics->Demonstrator GUI, the following interface appears.
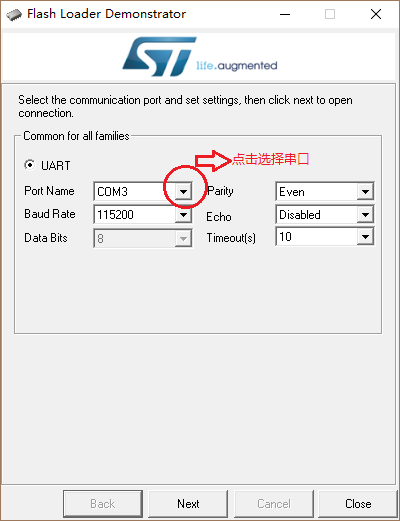
- Select the default settings, always point next (If you click next failure, re-power the chassis and try again), the following interface appears:
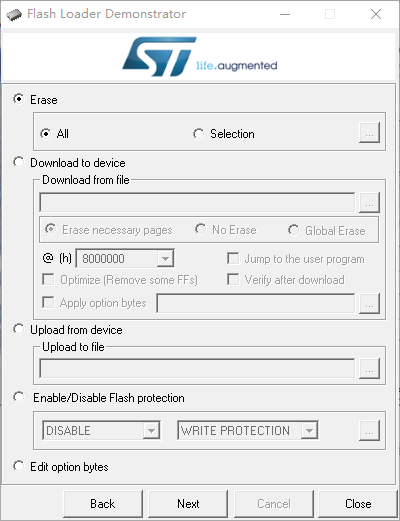
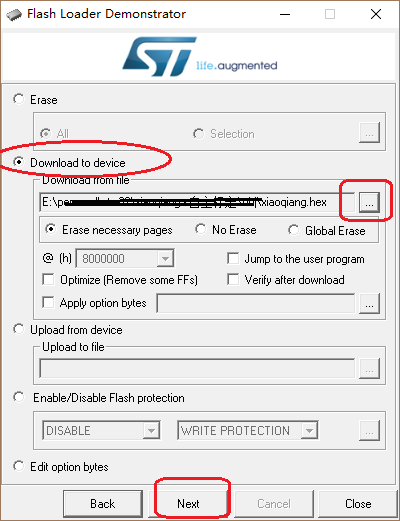
- Select Download to device, select the hex file provided above, click Next to start the download.
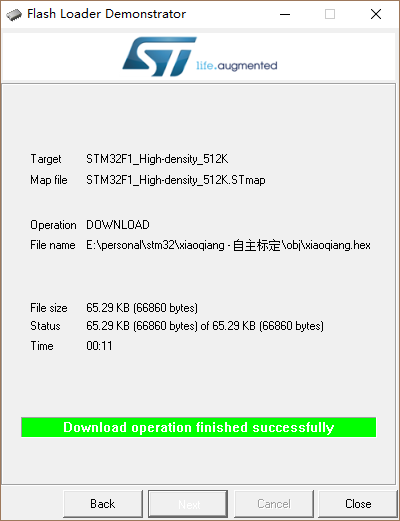
After the burning is completed, please close the software, power off the chassis, and insert USB to serial port back to Xiaoqiang's host computer.
Slowly unplug the stm32 core board on the chassis again, adjust the two shorting caps on the board back to the initial state, insert it back into the chassis (pins need to be fully aligned with the insertion base), the green motor driver board The middle "VMOT GND" wiring is plugged in, stm32 upgrade is completed!

- Chassis re-powered, according to the tips at the beginning of the article to complete the upgrade of the host computer.