xiaoqiang tutorial (13) rplidar A2 LiDAR useage and set udev rules for serial devices for xiaoqiang
rplidar A2 LiDAR useage and set udev rules for serial devices for xiaoqiang
The 1, 2, 3, and 4 steps of the tutorial in this section are only used to demonstrate the method of adding serial devices to Xiaoqiang. These rules are already added in Xiaoqiang system image. Xiaoqiang users should directly jump to step 5 to test the lidar after connecting the hardware.
Xiaoqiang host and motor driver communicate through the serial port, In the actual development process, we may add serial peripherals to Xiaoqiang. This can lead to confusion over the serial number (ttyUSB*), causing anomalies in the xiaoqiang's ros driver and serial device. The following uses the rplidar A2 lidar as an example to demonstrate how to resolve serial port conflicts by modifying the device serial number specified in the udev file. The source of this method
1.Check the ID of each serial device
sudo apt-get install expect-dev
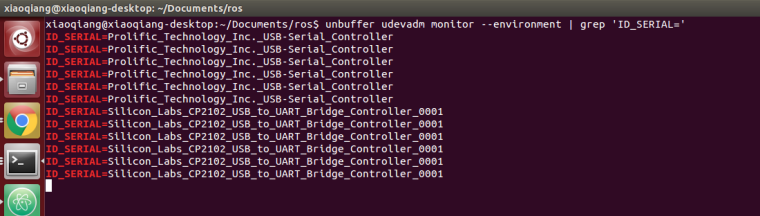
unbuffer udevadm monitor --environment | grep 'ID_SERIAL='
After the USB to serial cable of the platform is re-plugged, the terminal will print out the ID information of this device. For example, "Silicon_Labs_CP2102_USB_to_UART_Bridge_Controller" in the following figure.
Then re-inserted the lidar's usb adapter into the host, and the terminal will also print the lidar's ID information. For example, "Prolific_Technology_Inc._USB-Serial_Controller_0001" in the following figure.
2.Please create a udev rule file based on the ID of the serial device you obtained. Specify platform communication USB to serial port as ttyUSB001 and lidar as ttyUSB002.
sudo gedit /etc/udev/rules.d/60-persistent-serial.rules
Enter the following content and save it. Please replace the string following ID_SERIAL with the ID you obtained in step 1.
ACTION!="add", GOTO="persistent_serial_end"
SUBSYSTEM!="tty", GOTO="persistent_serial_end"
KERNEL!="ttyUSB[0-9]*", GOTO="persistent_serial_end"

# This is old 11.10 style: IMPORT="usb_id --export %p"
IMPORT{builtin}="path_id"
ENV{ID_SERIAL}=="Prolific_Technology_Inc._USB-Serial_Controller"         , SYMLINK="stm32Platform"        , SYMLINK+="ttyUSB001" , OWNER="xiaoqiang"
ENV{ID_SERIAL}=="Silicon_Labs_CP2102_USB_to_UART_Bridge_Controller_0001" , SYMLINK="rplidarA2"       , SYMLINK+="ttyUSB002" , OWNER="xiaoqiang"

LABEL="persistent_serial_end"
Update system udev rules
sudo udevadm control --reload
Re-plug all USB devices, now the platform communication USB to serial successfully identified as ttyUSB001, lidar is identified as ttyUSB002, regardless of the device insertion order and port.

3.Modify the ROS driver node launch file, set the serial device as ttyUSB001.

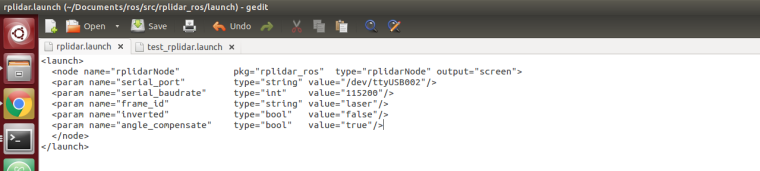
4.Modify the ROS driver node launch file for rplidar A2 and set the serial device as ttyUSB002.
# Driver installation
cd ~/Documents/ros/src
git clone https://github.com/BlueWhaleRobot/rplidar_ros.git
cd  ..
catkin_make
- After restarting Xiaoqiang, it is now possible to use the lidar and xiaoqiang normally at the same time. For example, run the following command to test the lidar.
roslaunch rplidar_ros view_rplidar.launch
