Chapter3 Mapping and Navigation
3.1 System introduction
Navigation Workflow:
In mapping mode, you can bulid a map for the robot by controlling the robot to walk around in the target area.
Using our client to draw navigation paths manually and set target points in the map we build in the step one.
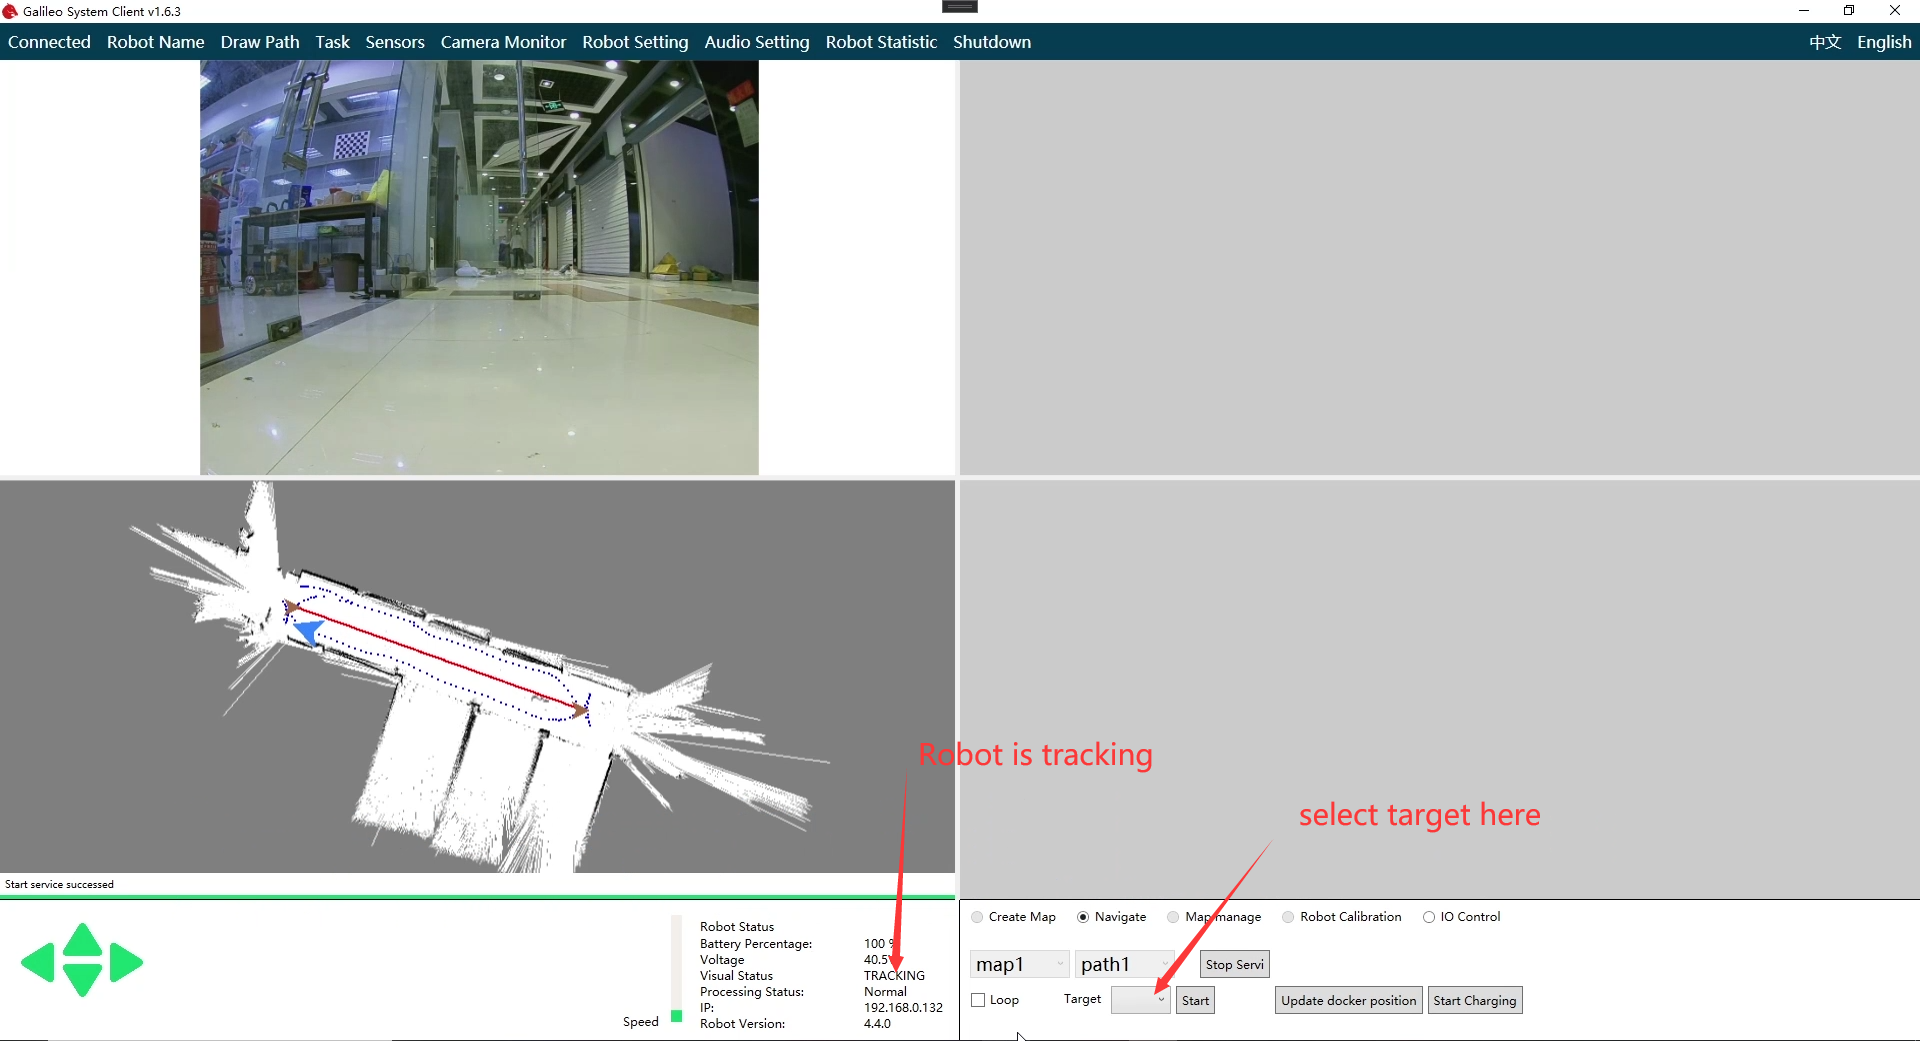
Start navigation after path and target point are set. Select target point and click start button, then the robot will move automaticly to the target point along the trajectory we drawed in step 2.
Full demo video:
3.2 Buliding map
First, you need to click “Start mapping” button and wait a moment.
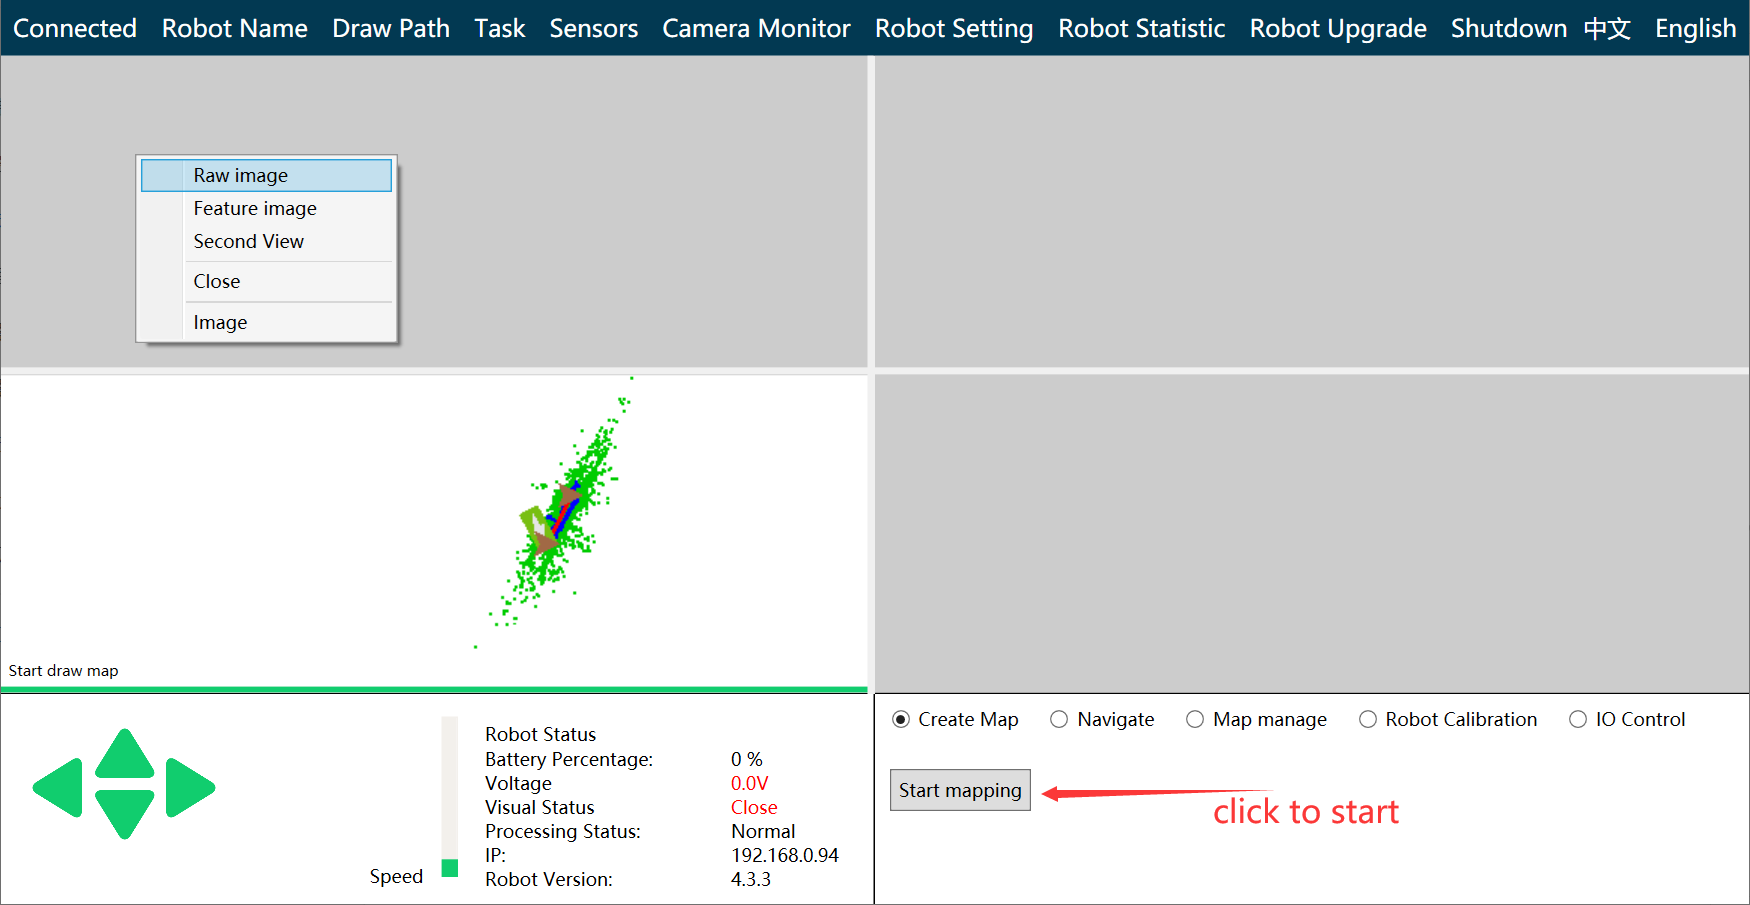
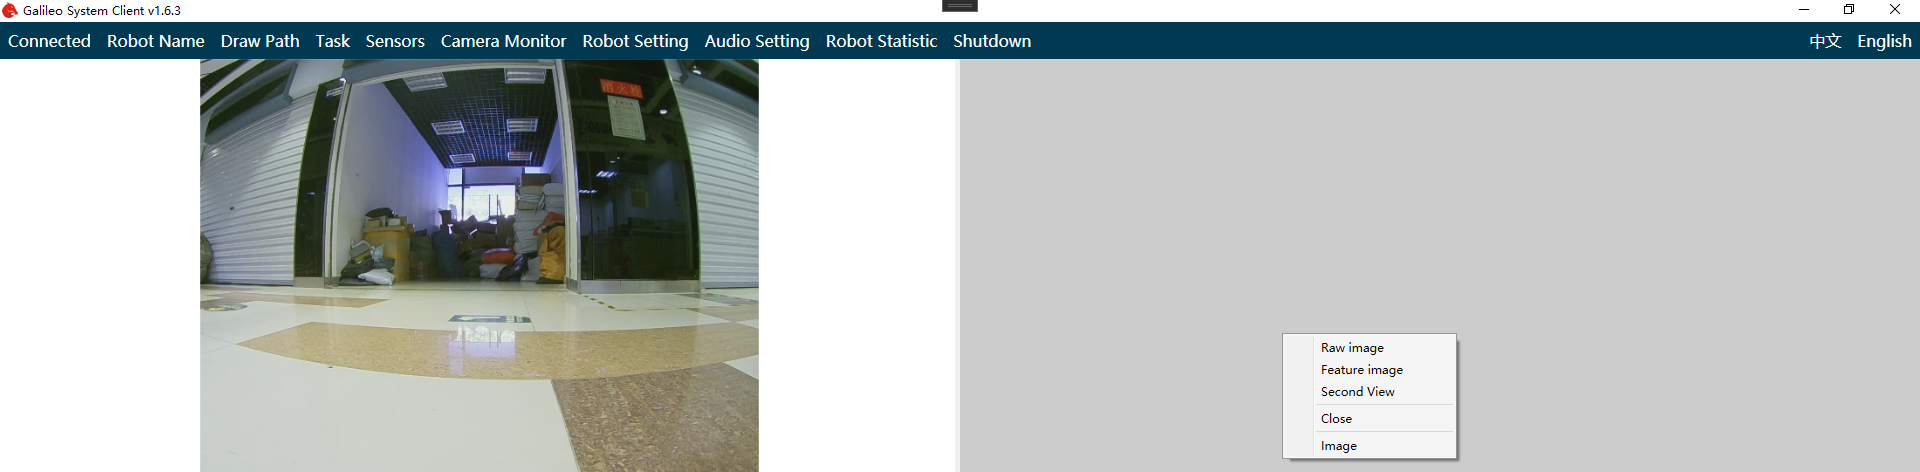
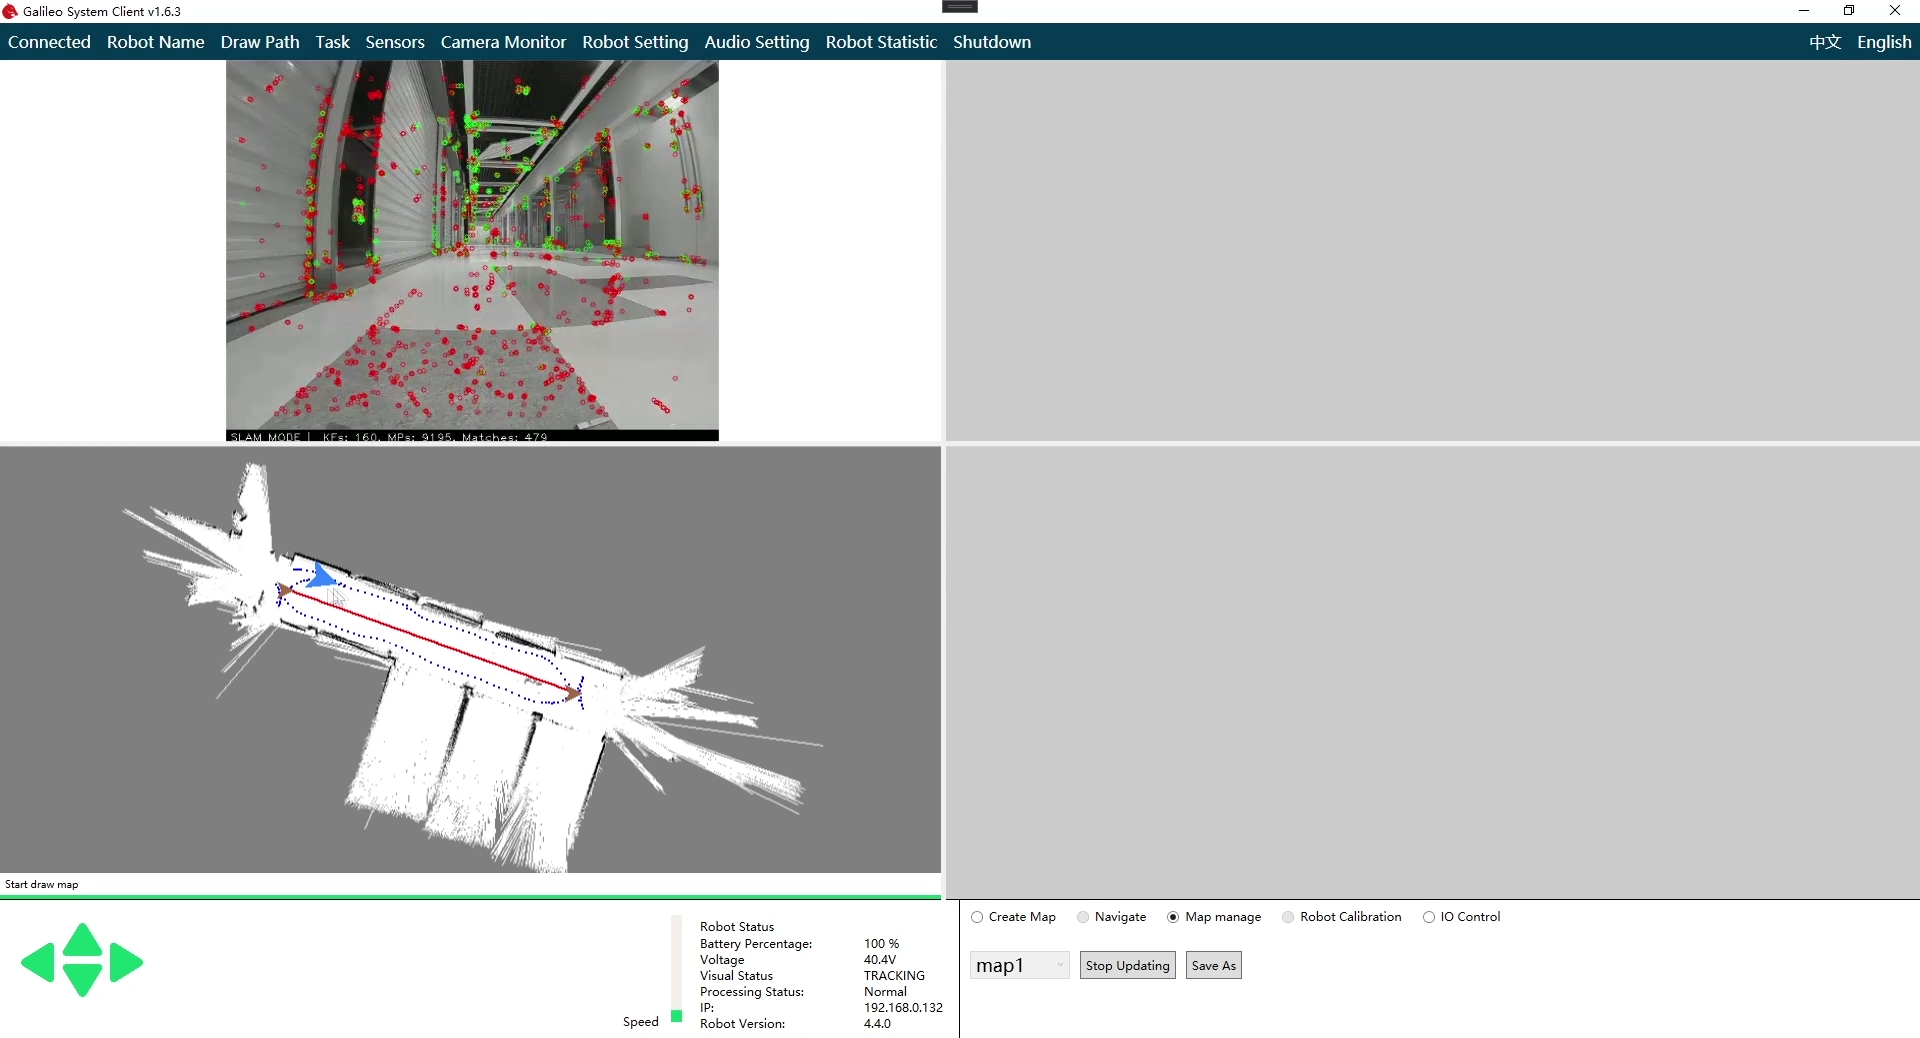
Right click on the screen2 and choose Feature image in the right-click-menu
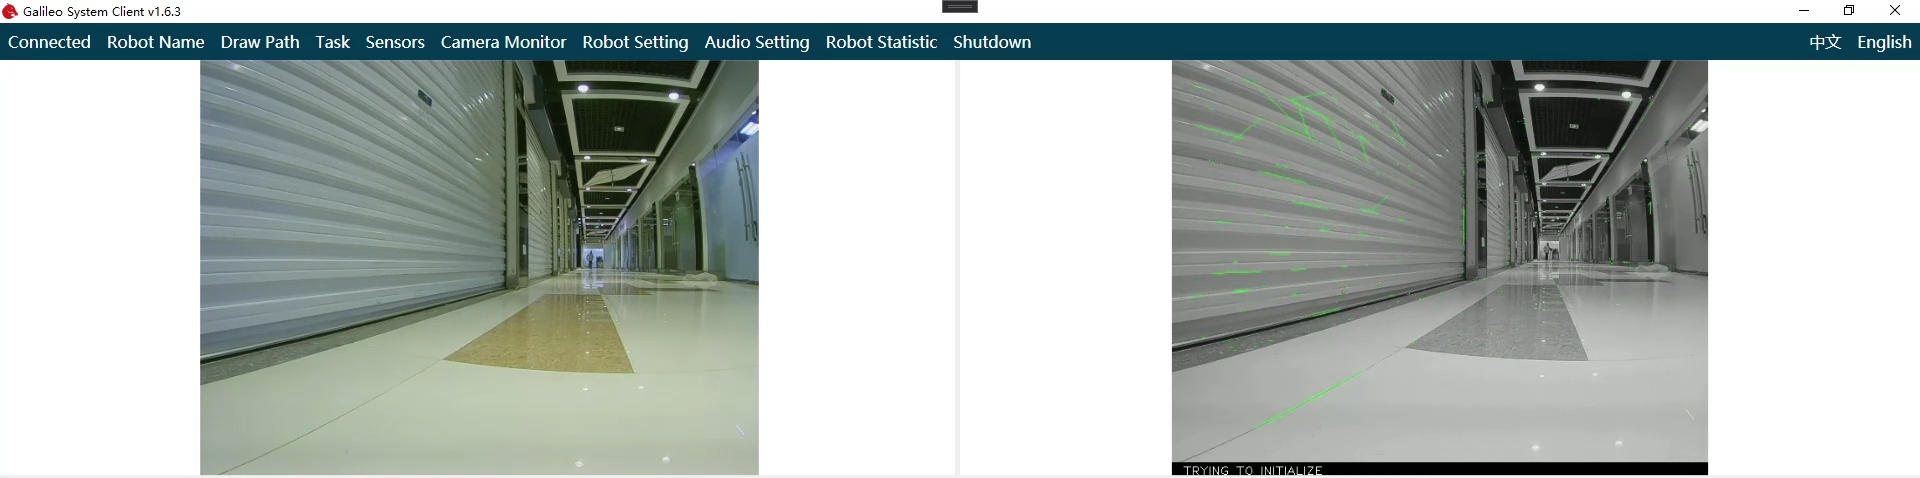
Control the robot to go forward until visual system starts successfully
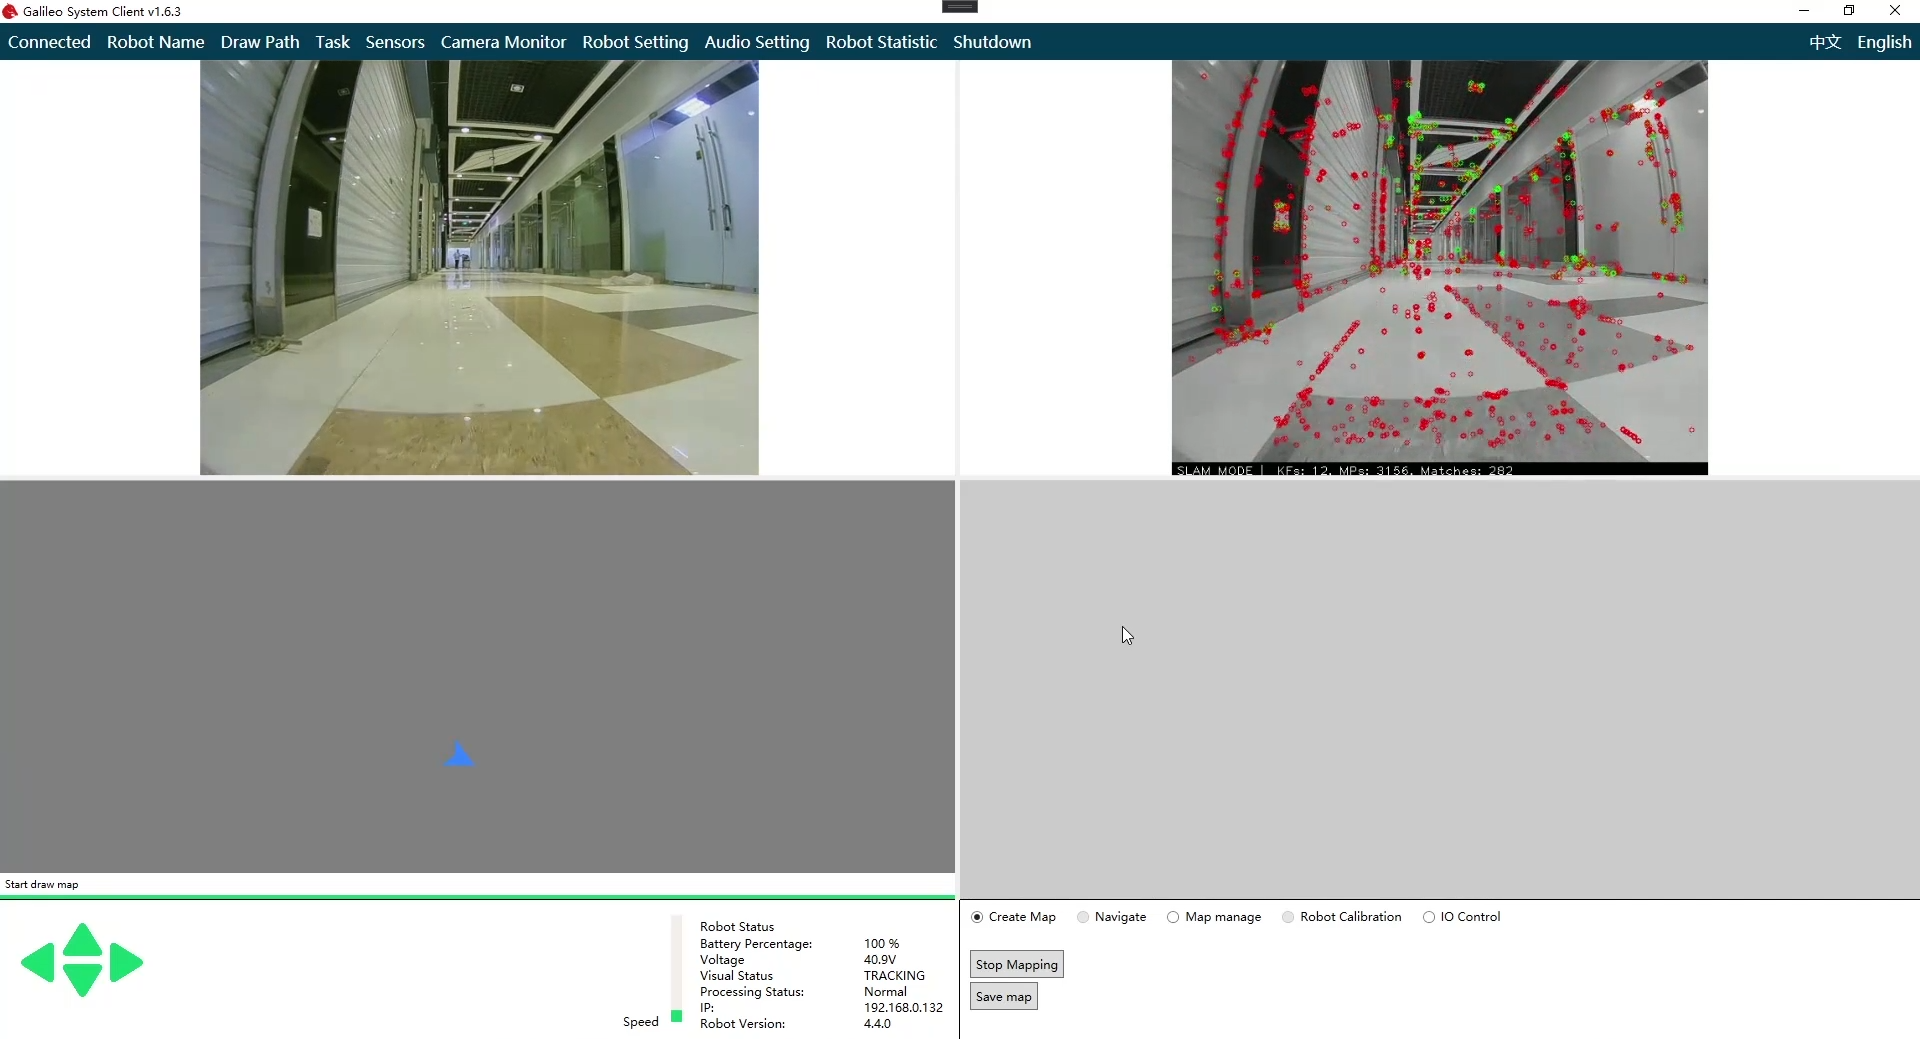
Now control your robot move around the target area. Please do not turn left/right without pressing front key or back key, it will make the visual system lost target.
Please ensure Visual Status is TRACKING. Once it becomes LOST with red color, you must control the robot to go backward just by pressing back key until the status turns to TRACKING.
Please do not move the robot when the status turns to Loop Closing. When the robot walks a circle, the robot automatically optimizes the previously created map, which greatly improves the quality of the map. As a result, the remote-controlled robot can walk the closed path multiple times during mapping, which will create a more accurate map. The quality of the map will greatly affect the effect of navigation later.
Buliding map example:
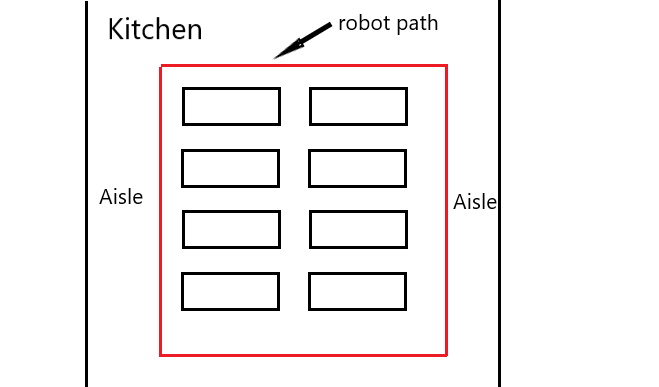
There are aisles on either side and tables in the middle. We can remotely control the robot to follow the red route first clockwise. Turn counterclockwise after the client prompts "Closed Loop Optimization Complete". Closed-loop optimization is also required. In this way, we can get a better map.
The quality of map will effect navigation greatly.
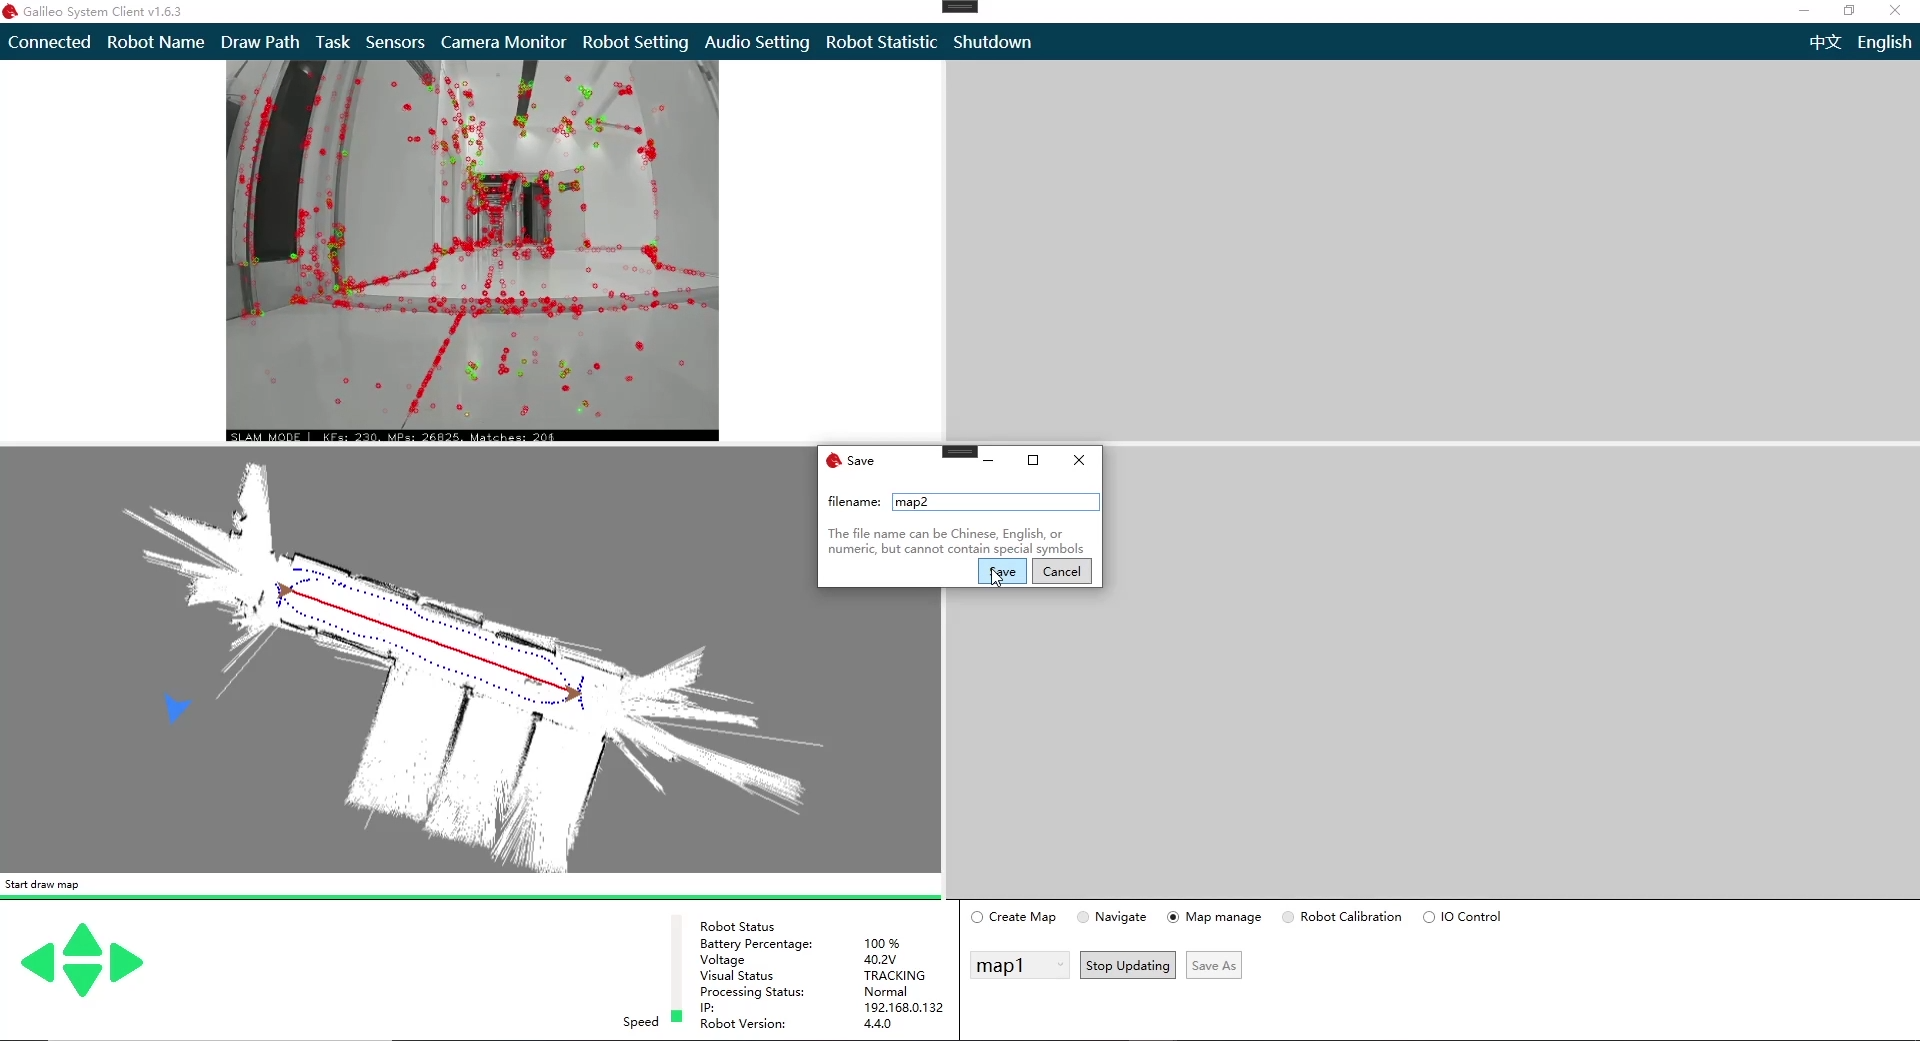
Stop moving after going around the target area, clicks the "Save Map" button on the main interface, and waits for the save dialog box to pop up. Enter "Map Name" in the dialog, and then click OK. Wait for the map to load.
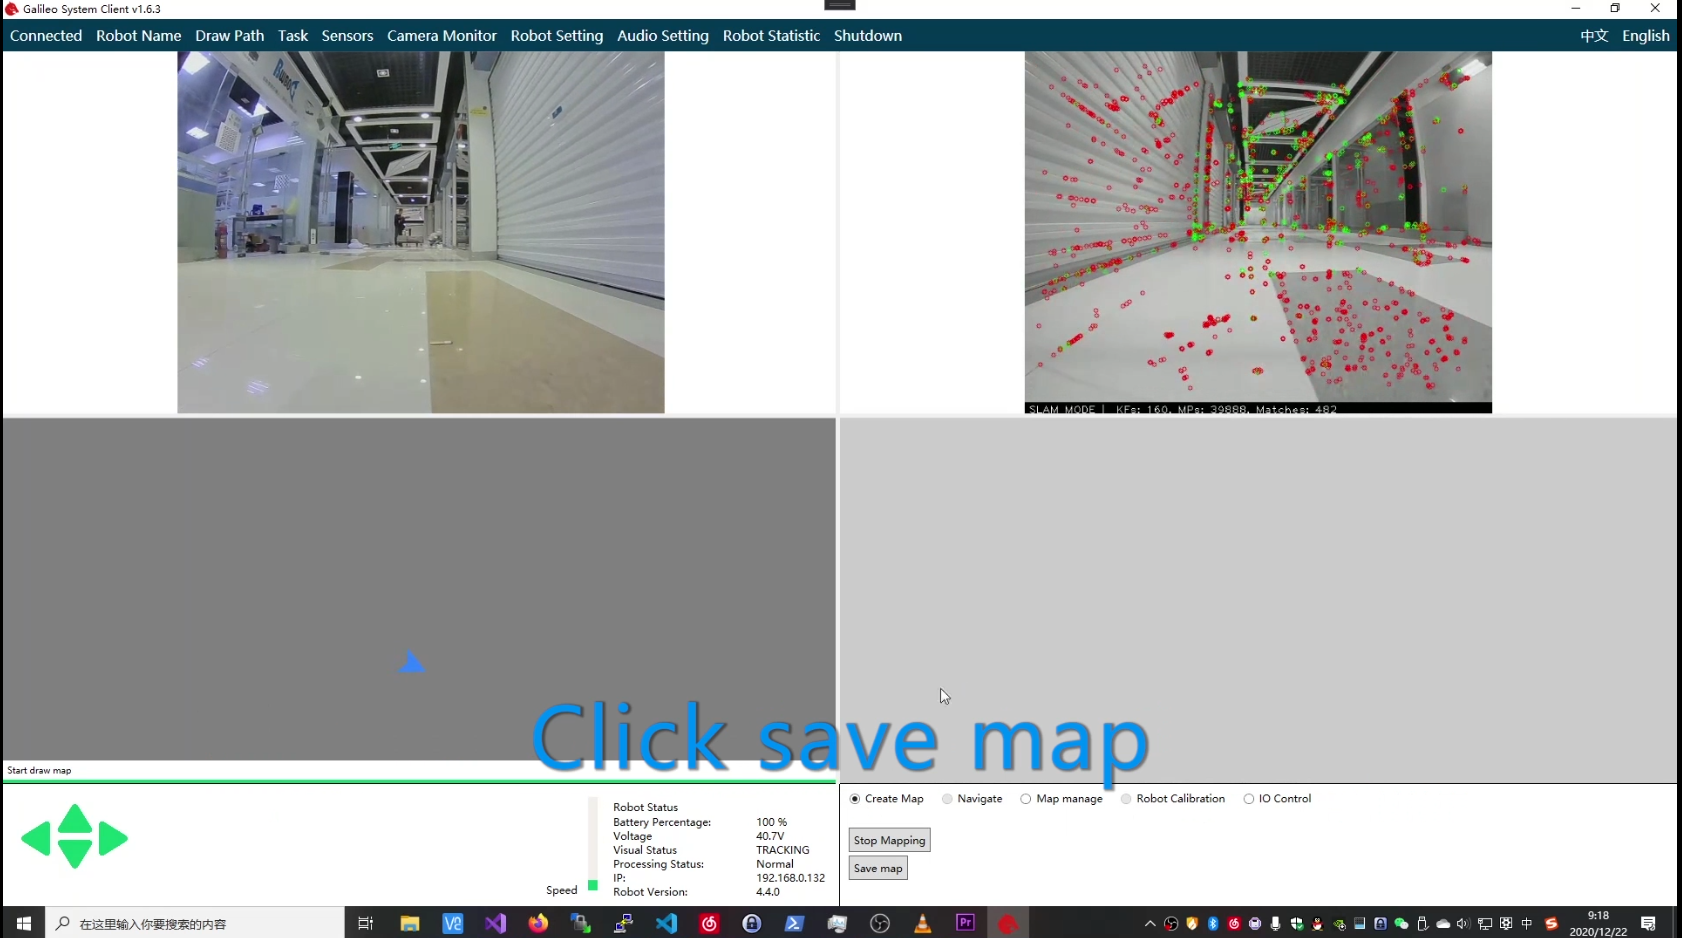
After loading-map complete, you can see the map on the screen. If you think it's ok, you can click stop mapping and now mapping is completed.
3.3 Draw mavigation path & Set target point
Full demo video:
Warning:Please be patient and waiting for the update of UI, because it will take a long time to exchange data between the robot and software while we run the operation of section3.3.
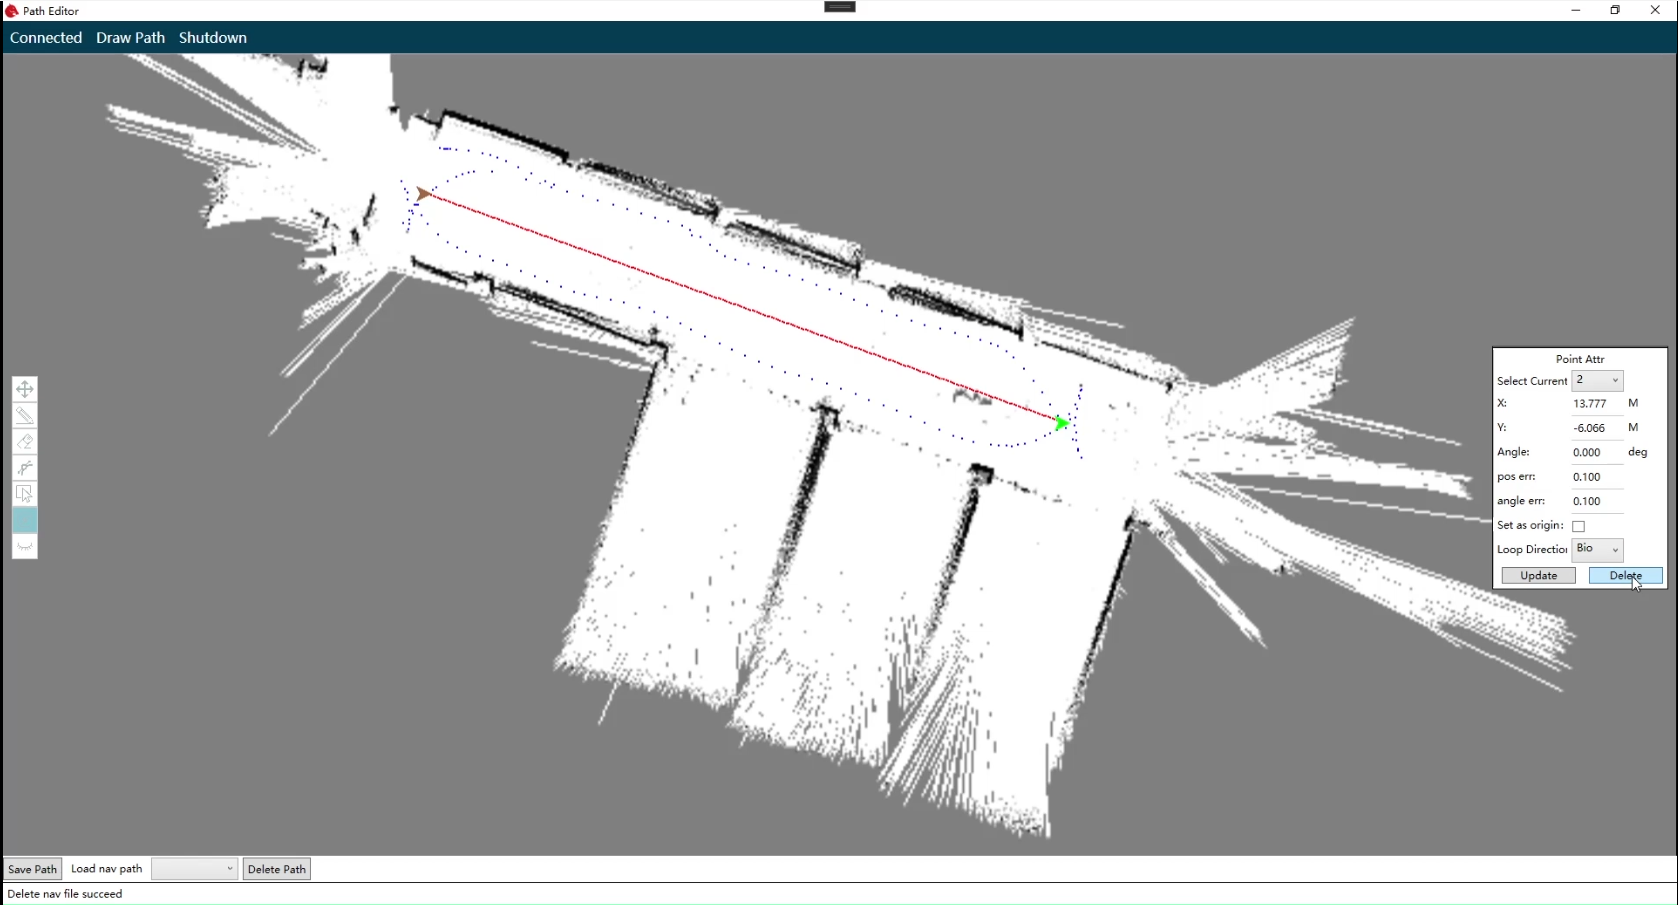
After connecting to the robot successfully, click the "Draw Path" button on the upper menu bar of the main interface to open the navigation path editing interface.
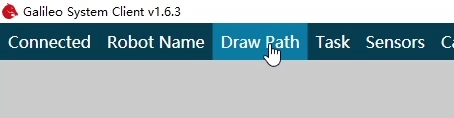
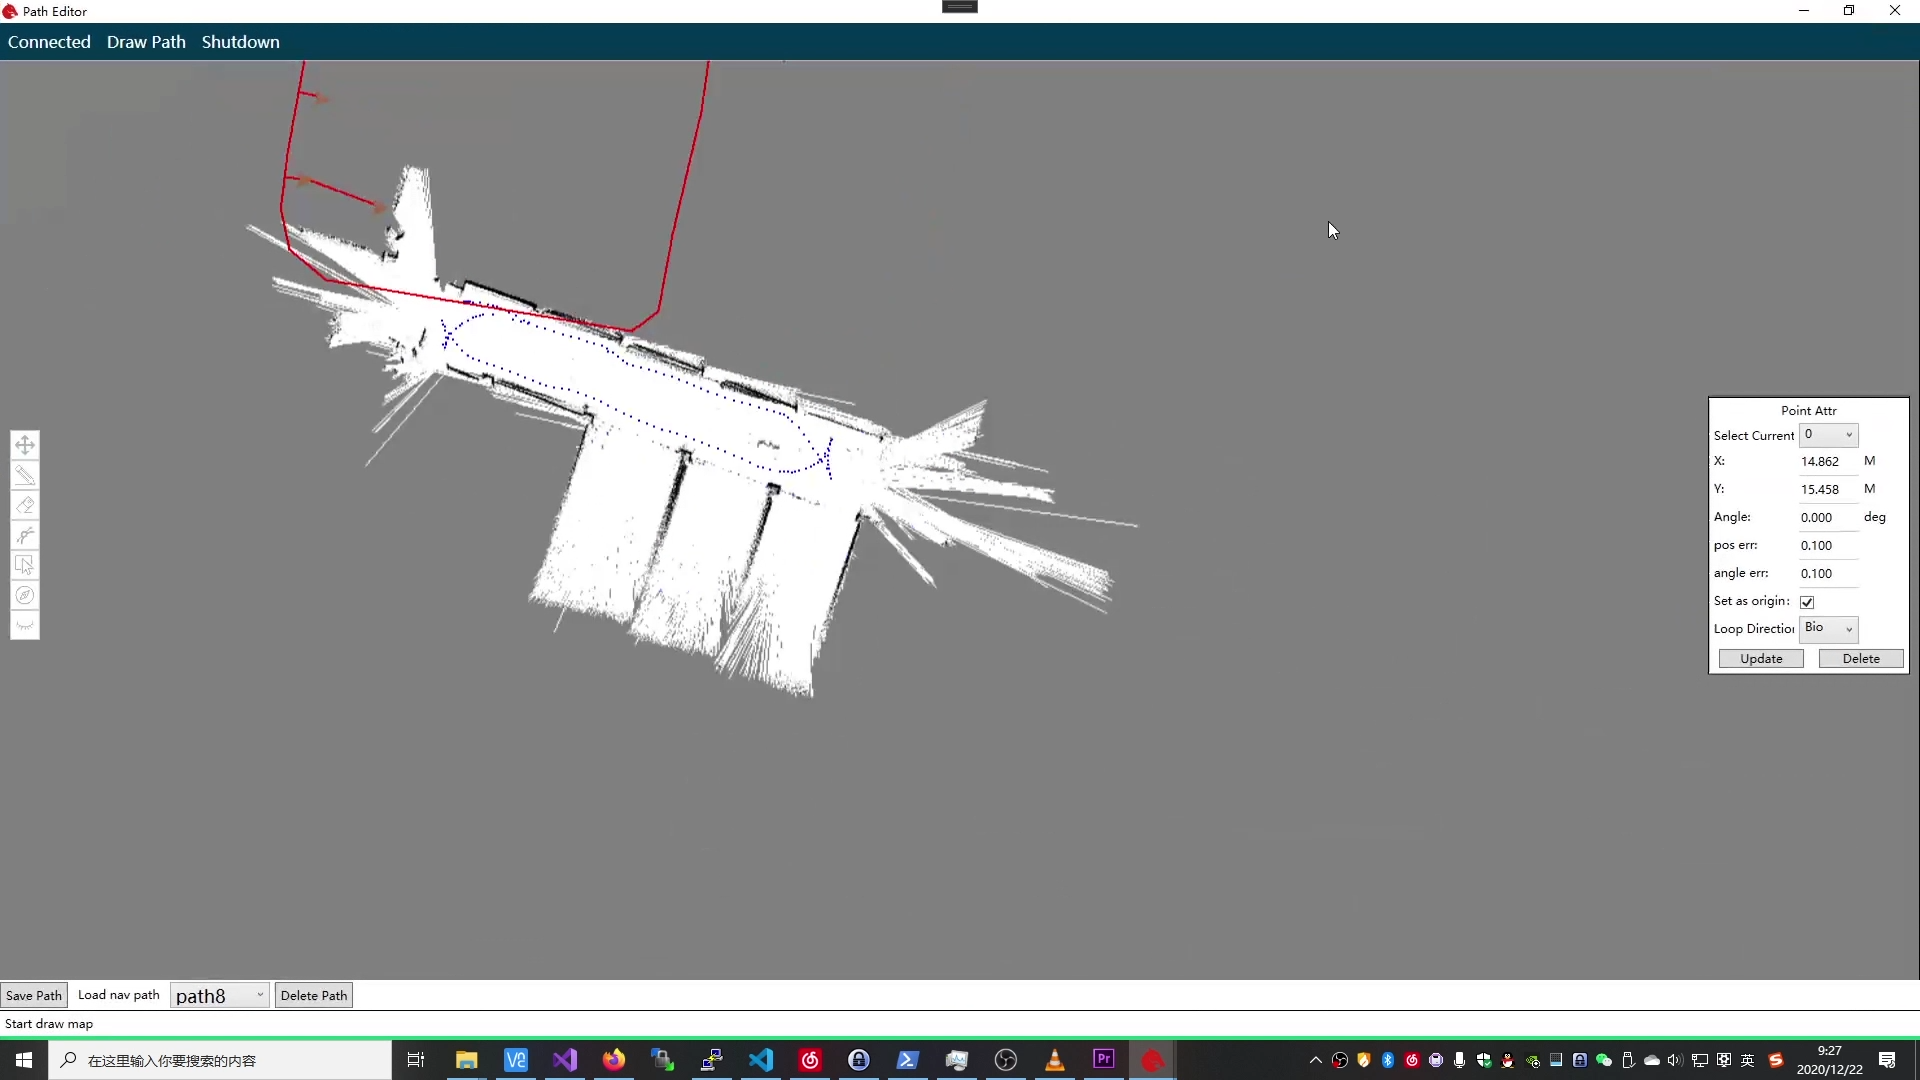
UI just like the image below.
3.3.a Draw navigation path
The navigation path is the path you want the robot to go. Click "start navigation" on the main interface, the robot will move according to the path you draw. Here's how to use the path drawing tool.
 1. Basic operation
Basic operations include pan and zoom. Drag the map with the left mouse button to pan the map. Scrolling the mouse wheel forward and backward can zoom the map, which is very useful in drawing the path. For the places where the movement requirements are more detailed, you can zoom in and draw.
 2. Pencil tool
Click the pencil-like icon in the toolbar on the left. This is the linear tool. Use the left mouse button to click a point on the graph as the starting point, and then move the mouse, a red line will appear, move the mouse to the desired end position, click the left mouse button again, a line will be drawn. If you want to draw a polyline, you can click twice in a row at the turning point.
 3. Eraser tool
Click the eraser tool in the left toolbar, and then drag with the left mouse button to erase the previously drawn points. The erasing range of the eraser is very small, the delete operation is recommended to use the following delete tool.
 4. Curve tool
Click the left curve tool, click the left mouse button at the starting point of the curve, then click the left mouse button again in the middle of the curve, and finally click the left mouse button at the end point of the curve. Such a curve is drawn. Note that if you want the robot to walk closer to the planned route or smooth walking, it is recommended to use this tool to adjust the turning radius of the corner.
 5. Deletion tool
If you want to delete the previously drawn points on a large scale, you can use this deletion tool. Click the delete tool on the left and then click the starting point of the deletion with the left mouse button. You can see that a rectangle has been following during the movement of the mouse. Click the left mouse button again to delete the selected area of the rectangle.
Using these tools, you can draw the robot's navigation route. Pay attention to try to follow the original trajectory (blue dots) to draw the line, so as to ensure that the robot can move smoothly in the planned route. There are dense black spots around the map that are the boundaries of the area or the outline of obstacles. These points can roughly reflect the surrounding state. For the service robot, the drawn paths must be connected.
3.3.b Set target point
For robot application scenarios, the robot needs to move back and forth between several fixed positions. For example, walk from the kitchen to table one, and then return to the kitchen to table two and so on. The following work is to mark the location of each target point on the path drawn above. After that, we can send the corresponding target point to the robot, and then let the robot automatically go to the target point.
Click to activate the navigation target point insertion tool, and click on the navigation route in turn to insert the navigation target point. You can also use the eraser and delete tools to delete the navigation target point.
The selected target point is green, and its information will be displayed in the point attribute panel on the right. ATTENTION: Point 0 means the kitchen in food-delivery scenario.
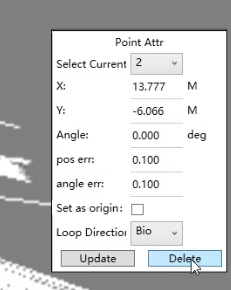
Point attribute description:
(1) To switch points, you need to use the point switch button on the upper side of the site properties window to switch.
(2) To accurately adjust the position of the point, the position of the point can be changed by modifying the "X axis" and "Y axis" under the point properties.
(3) Modify the direction of point by modifying the "angle". The direction of the arrow is the direction of the robot after driving to the destination (the robot must turn to this direction to confirm its arrival at the destination).
(4) The "radius difference" and "angle difference" are the allowable position error and the allowable angle error when the robot reaches the target point.
(5) The circulation direction is to adjust the circulation direction, and the default is bidirectional.
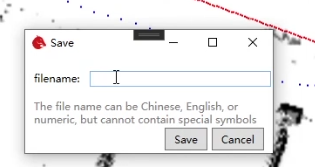
3.3.c Save and upload the navigation path file
On the editing interface, click the "Save Path" button and a save dialog box will pop up to enter the file name, and click "Save".
3.4 Start & Stop navigation service
Full demo video:
After connecting to the robot and loading map successfull, the client can load path and point we drew and set automatically.
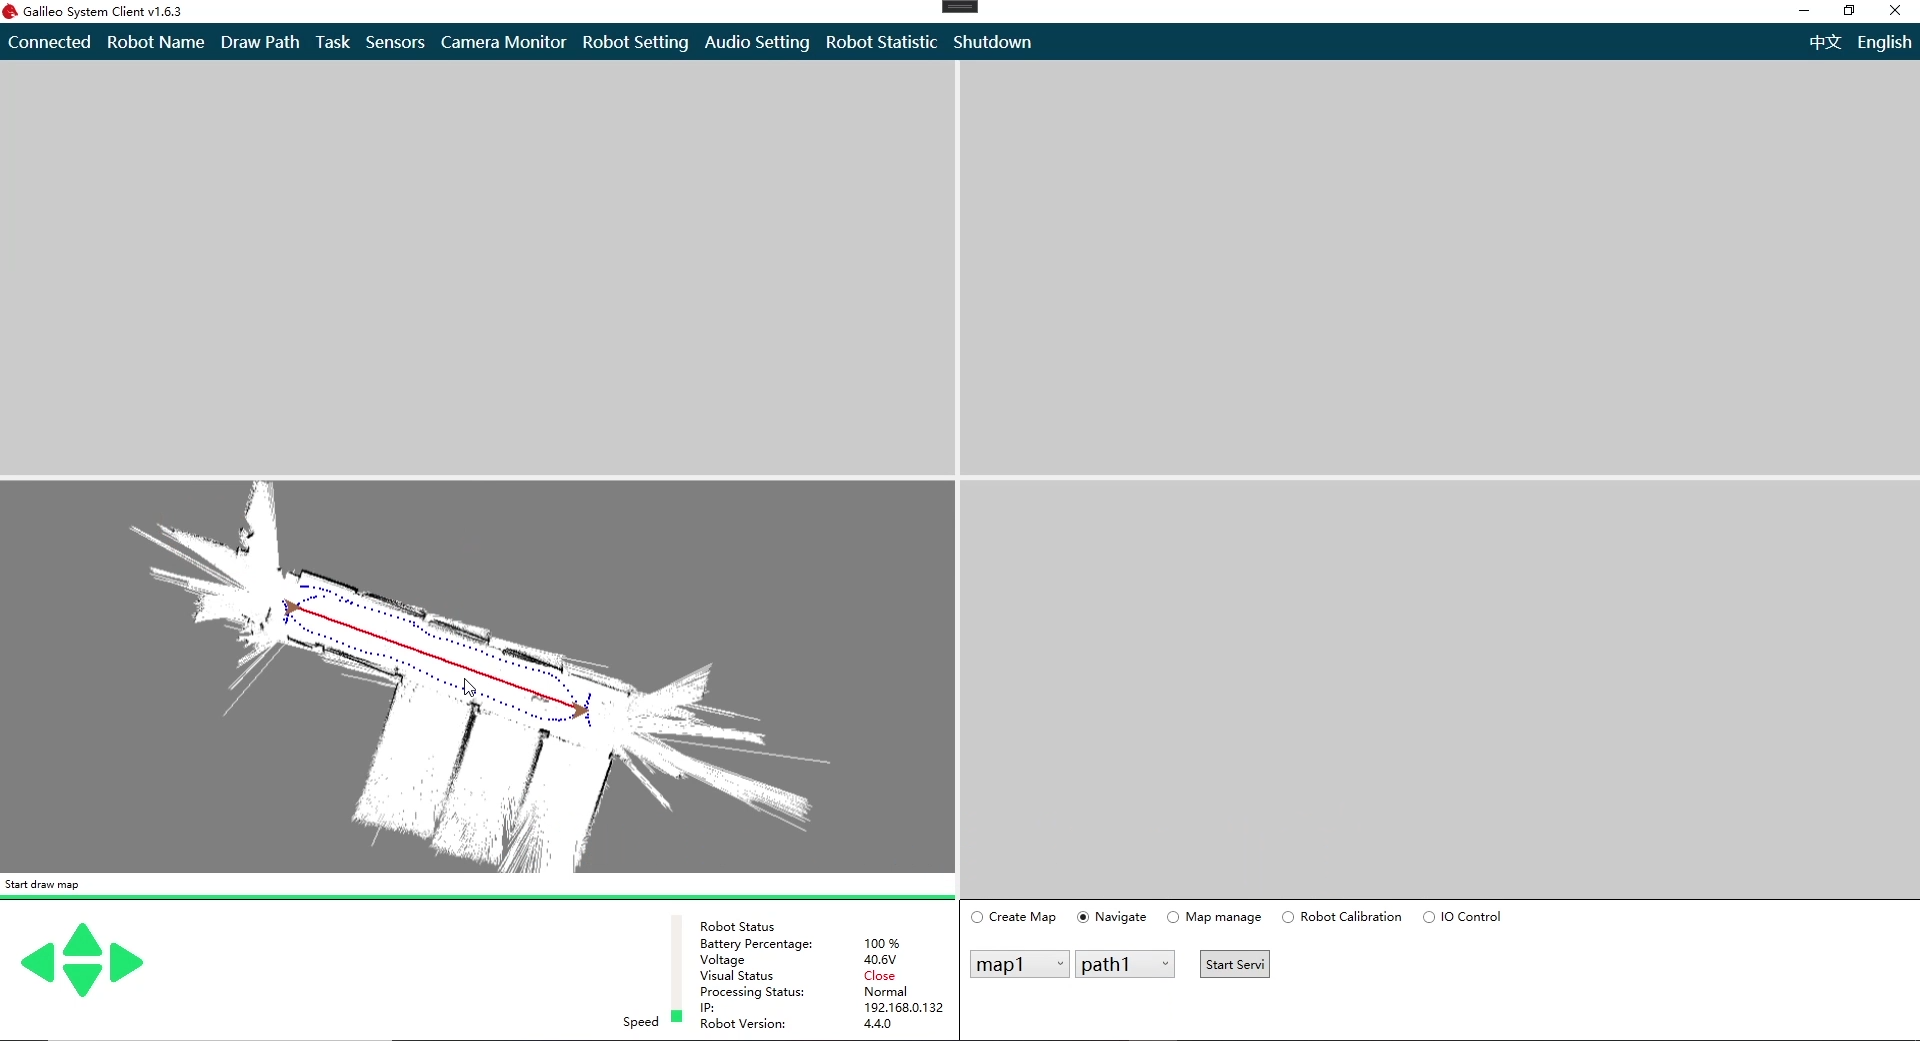
Control the robot move to the position that can be tracked, the robot must be on the navigation path, and the orientation of the robot must be consistent with the orientation of the mapping.
Select "navigation" and click the "Start Service" button to start the navigation service. After loading the program, the robot starts to move autonomously. At the same time, the blue block indicating the robot's position in the interface starts to update synchronously.
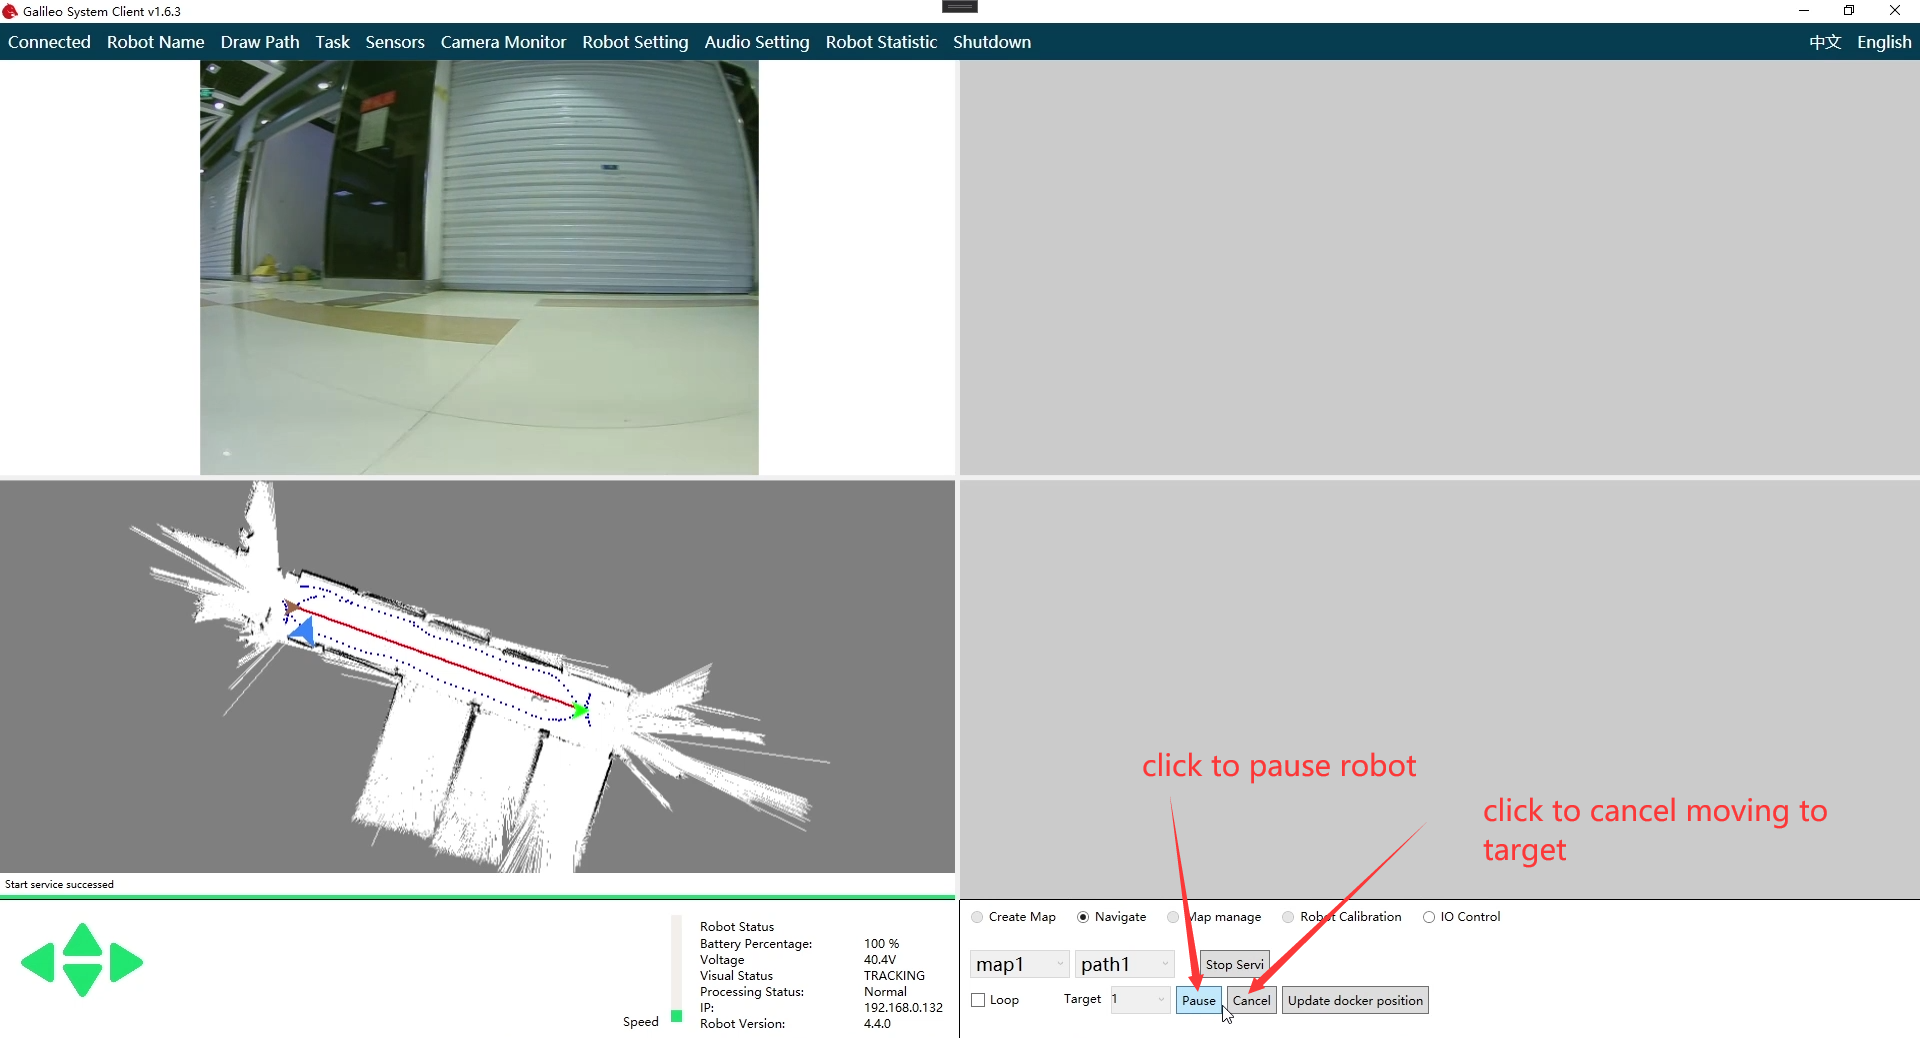
If you want to stop the navigation service, click the "stop service" button directly; If the robot suddenly stops moving during navigation, the visual state becomes "lost", which means that the visual system loses its target. There are two reasons: Reason 1: The initial movement direction of the robot is opposite to the movement direction when the map is established; Reason 2: Great changes in light intensity or environment. Solution 1 method: turn the robot around and start over; solution 2 needs to re-establish the map and plan the route. In case of emergency and uncontrollable, manually press the red emergency stop button on the back of the robot or touch the black anti-collision edge of the robot to stop its operation.
ATTENTION: Please press the red emergency stop switch on the robot under emergency.
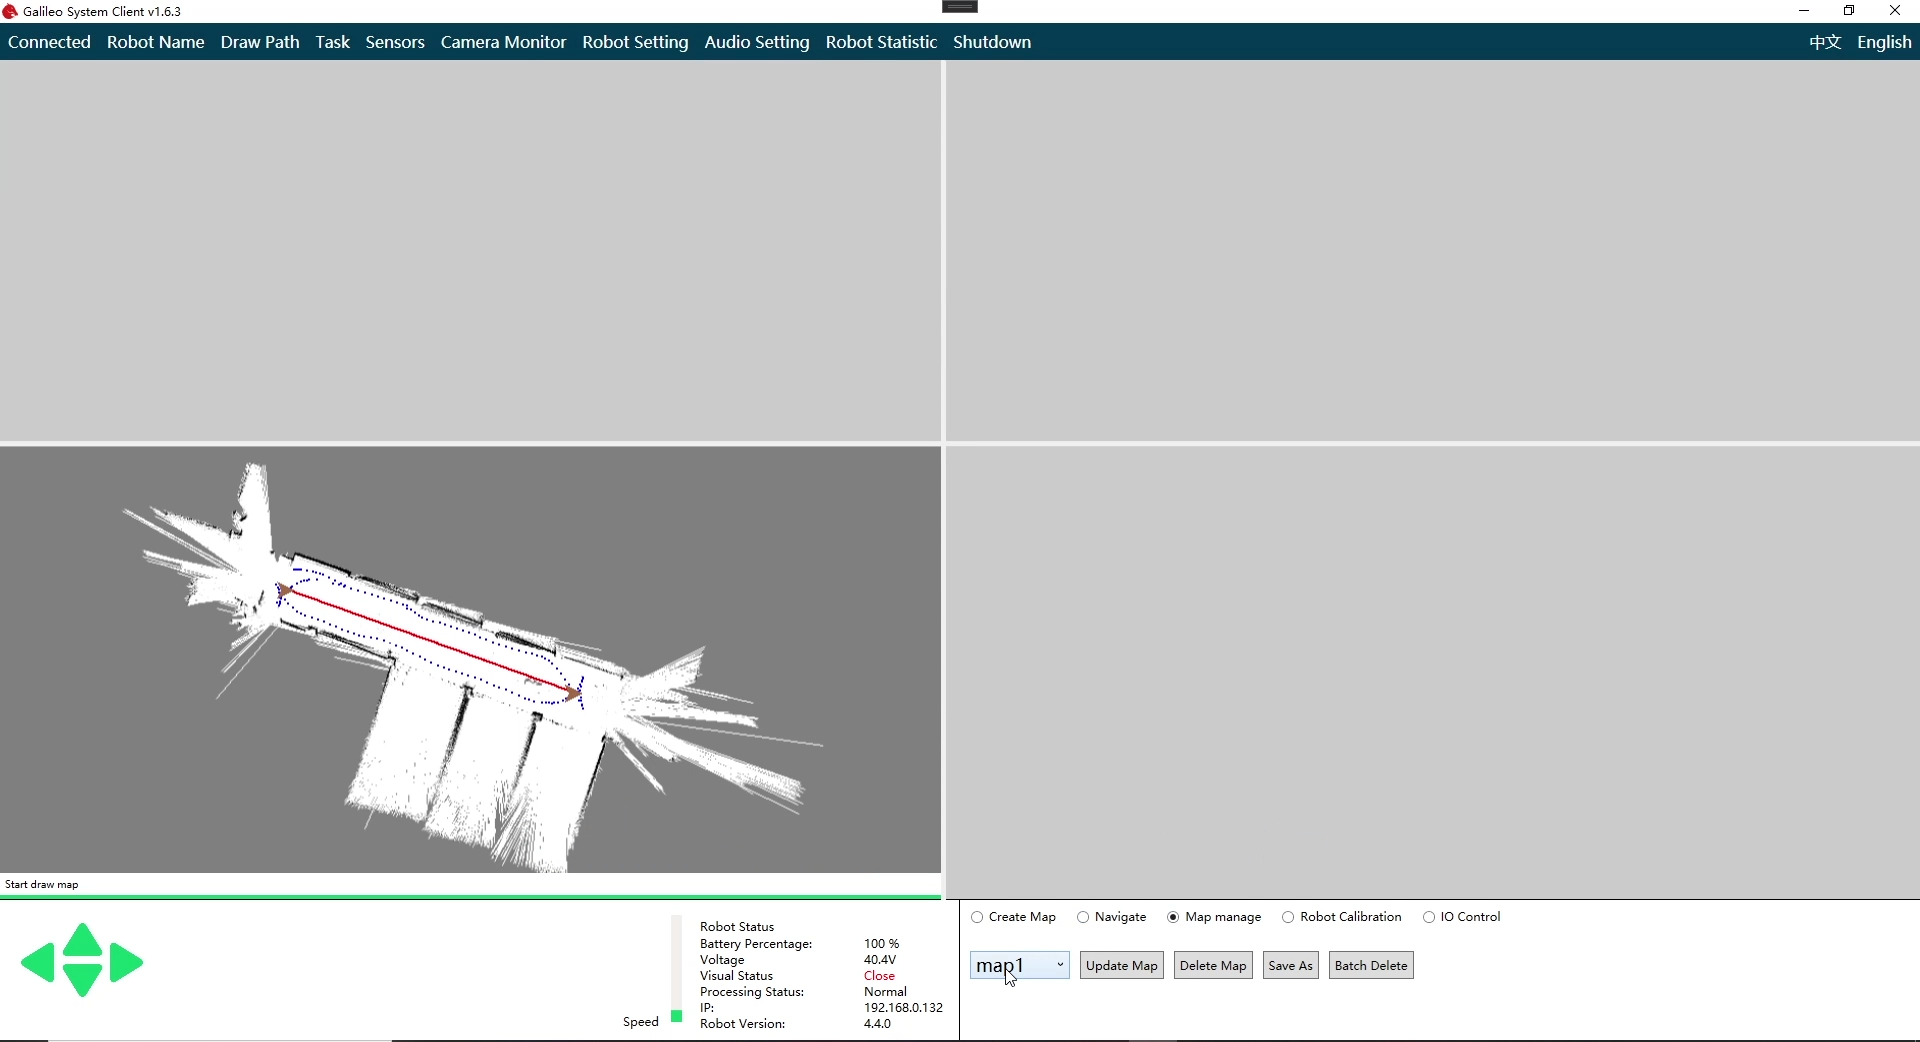
3.5 Navigation map management & update
The map management control panel provides map management functions, including "map deletion", "update", and "save as" .
3.5.1 Update
In actual use, the environment may change a lot, which makes the previously built map unable to continue tracking and use. At this time, the map needs to be updated. First, select the map to be updated in the left menu and click the update map button.
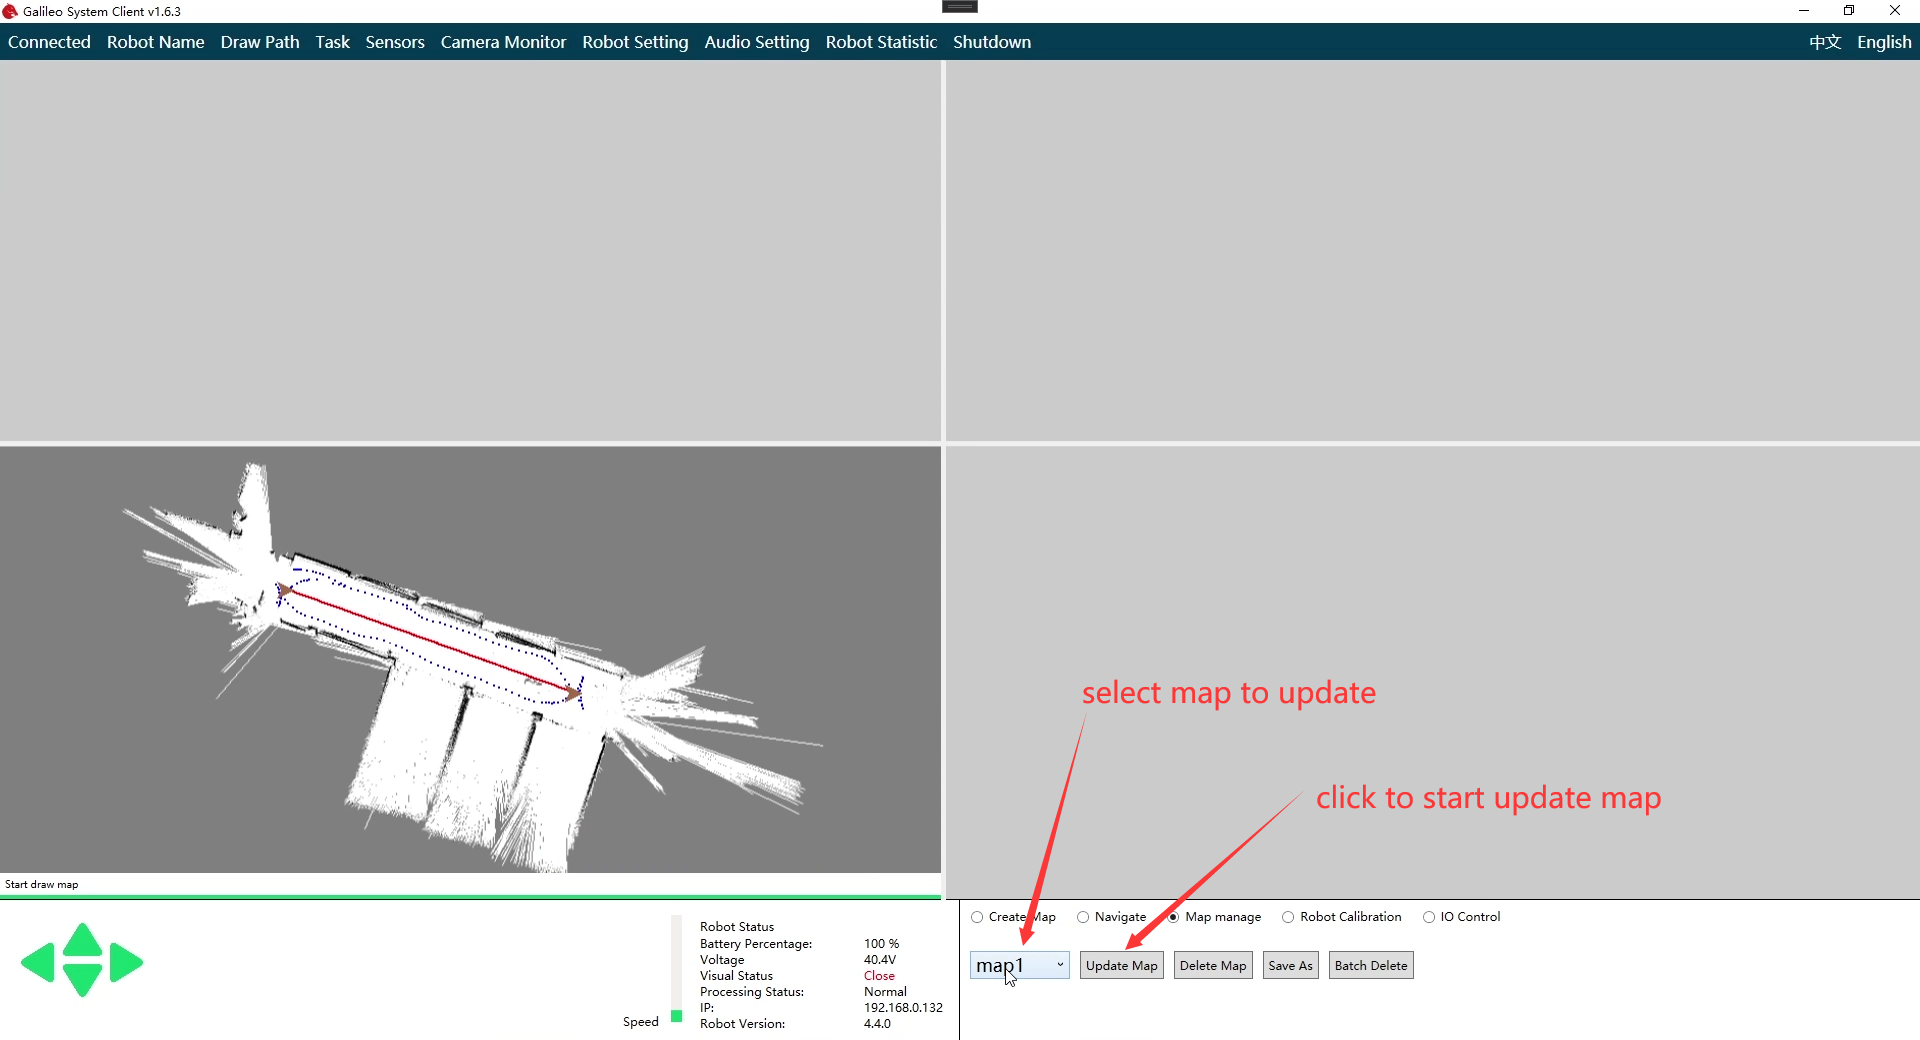
The robot may not be able to track when the update is turned on. At this time, the robot can be remotely controlled to a place where the environment does not change much, so that the robot can track the environment. The operation after that is the same as the process of mapping. When saving, enter the name of the map and wait for the save to complete (if the name is the same, the previous map will be overwritten). If you feel that the quality of the new map is good, you can click stop updating button to stop the map update process. You can see the newly updated map in the map drop-down menu. You can then use the new map to navigate.
3.5.2 Deletion
Find the drop-down menu in map management and select the name of the map you want to delete. Click the delete button on the right to delete the map.